
Turning Somthing Old into Something New

"𝕋𝕙𝕖 𝕛𝕠𝕪 𝕠𝕗 𝕕𝕣𝕖𝕤𝕤𝕚𝕟𝕘 𝕚𝕤 𝕒𝕟 𝕒𝕣𝕥." —𝕁𝕠𝕙𝕟 𝔾𝕒𝕝𝕝𝕚𝕒𝕟𝕠
I have always adored fashion and not just what it looks like, but the process of bringing fabric together and making it into something utterly stunning.
So...
I have recently finished upcycling an old dress that was too short on me, into a top and scrunchie.
In recent years I have had a go at alterinng some pieces of old clothing, but like anything, starting a skill is challenging and I feel like I am finally progressing!
If you want to start altering your clothes for sustainable reasons or purely for fun, then I recommend to ask someone you know who is handy with a needle and thread or who has a bit of background in making clothes. For instance, I was lucky enough to ask my mum as she learnt to sew growing up. The genius behind my mums skills was of course my wonderful Grandma and she was constantly making clothes for herself, my mum and her sisters when they were young. I guess most people did as it was the norm in those days... and yes I would definately love to go back in time just to experience that lol!
Another way is to attend classes in the day or evening or borrow/buy books. Lastly, just search the internet and YouTube, you'll be amazed at what you can find!
 |
| I used the lace that was originally at the bottom of the dress and stitched it to the bottom of the top. |
Some useful tips in sewing:
1. Scissors - Fabric scissors, zig zag scissors and nail scissors. Fabric scissors help you to easily cut the fabric, whereas normal ones will not work as well. Zig zag scissors (personal favourite) prevent the fabric to fray. Nail scissors are just essential when wanting to cut thread.
2. Seam allowance - This can vary depending on what garment you are making. It is basically the distance between the seam line and the edge of the fabric. This prevents the fraying of the fabric and the general security of the garment from coming undone. Here is the link to a YouTube video to tell you all about seam allowances: https://www.youtube.com/watch?v=c0q_U9cPkGA
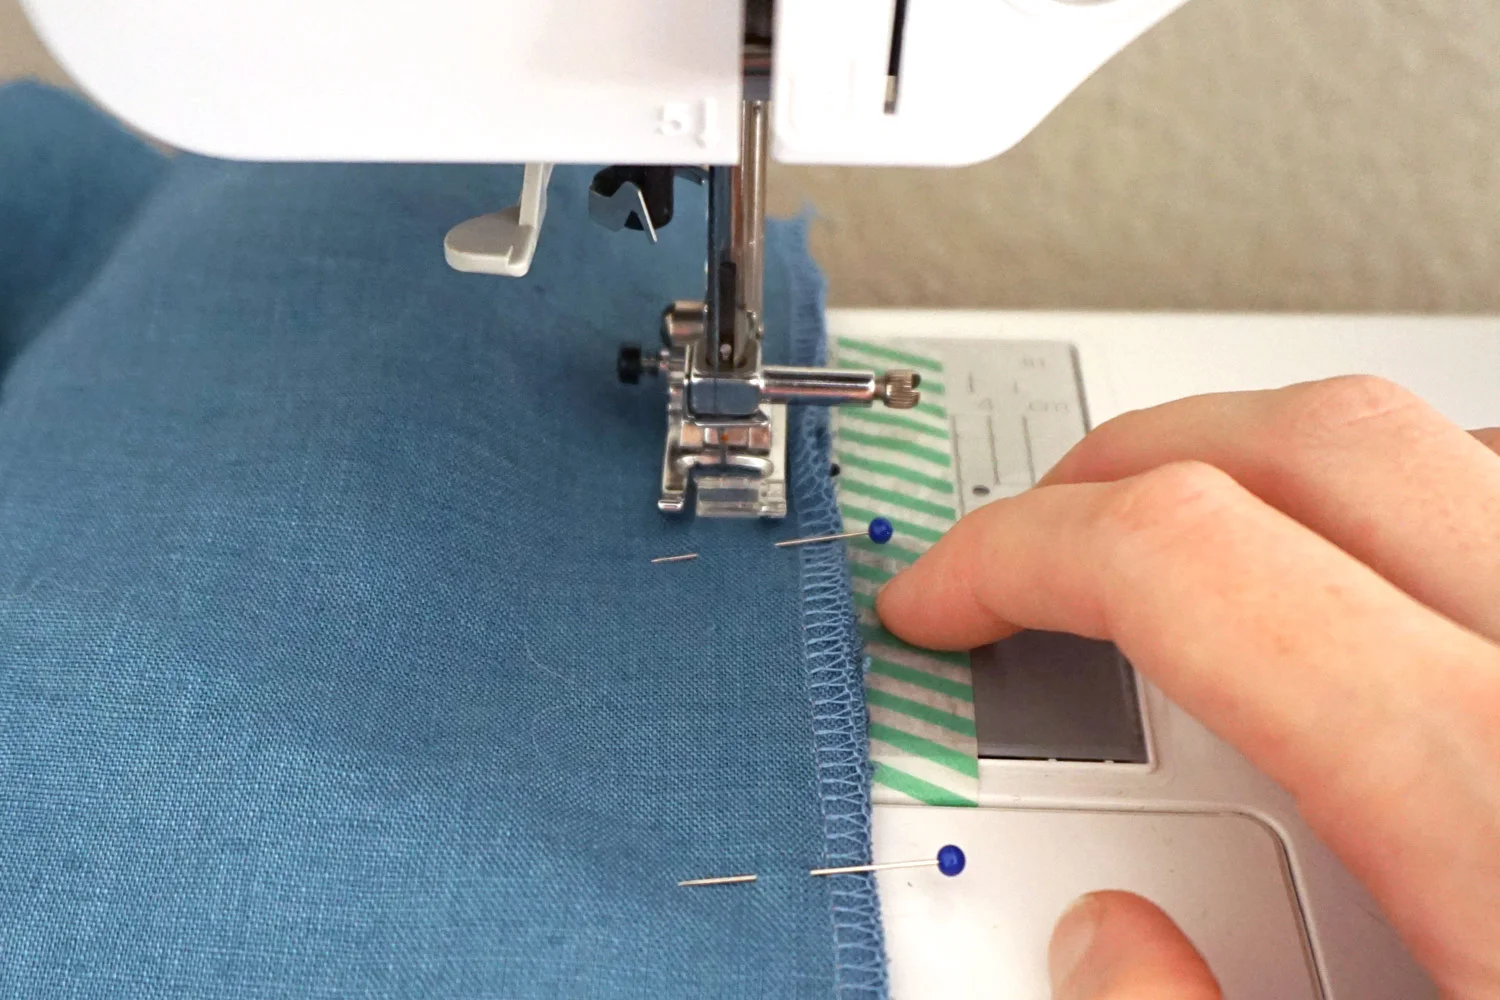
3. Pinning - When folding over the material or connecting it to another piece of fabric, you should always pin and not sew straight away as this helps keep it in place for when you want to accurately sew. The next stage after pinning is to tack, but if you want to skip this step and go straight to the sewing machine then make sure you have the pins the right way up, so that it stitches smoothly and doesn't damage the machine or fabric (see image below).
4. Tacking - If you want to tack (hand sewing into the fabric), this just enables extra security and accuracy when you eventually head over to the sewing machine. Here is a YouTube video for more information: https://www.youtube.com/watch?v=75Rh1NHAUc4
With some of the left over fabric that I had, I decided to make a scrunchie. I hadn't actually jumped on the bandwagon with the whole scrunchie trend and OMG why up until now had I not tried one! I personally have thick heavy hair and I have found that the scrunchie actually keeps my hair up all day, without it fallng out. To make the scrunchie I just simply went on YouTube, haha this is my go to for most things. It was so easy to make and it took me just under two hours. I am so going to be making a ton of these!
Here is the video I used to help me make one:

Hope you enjoyed this post and that it has inspired you to get creating!


Comments
Post a Comment